
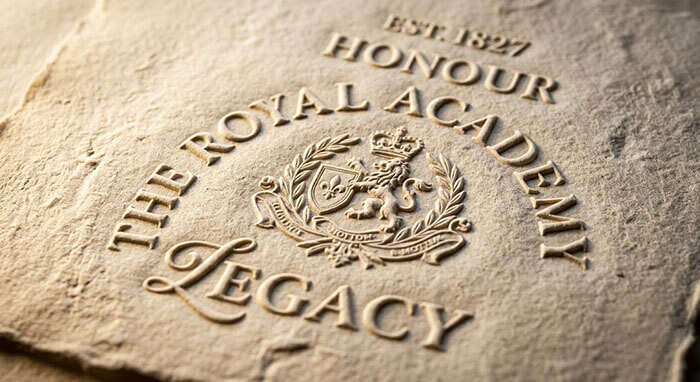
When you run your fingers across a high-end certificate or official charter, you immediately feel physical ridges and impressions in the paper. This classic tactile finish is achieved through embossing and debossing—two traditional pressing techniques that add subtle, inkless elegance and structural authenticity.
Unlike flat digital ink, physical paper deformation cannot be photocopied or scanned.
Understanding the difference between embossing and debossing helps you choose the right finish for your custom project at diplomafiles.com. Let’s break down the mechanics behind these two classic techniques.
1. Embossing: Raising the Detail
Embossing uses a set of matching male and female metal dies to press the paper upward, creating a raised 3D design on the front surface of the sheet.
-
Visual Effect: Catches overhead ambient light, creating soft highlights and realistic cast shadows along the edges of the logo or text.
-
Best Uses: Institutional crests, official seals, border accents, and high-security state emblems.
Embossing (Raised)  ──> Metal dies press paper UP    ──> 3D raised surface catching light
Debossing (Recessed) ──> Heavy die presses paper DOWN ──> Deep indented impression in fibers
2. Debossing: Pressing Deep into the Fibers
Debossing is the exact opposite. A heavy metal die presses forcefully down into the front of the page, creating a deep, indented impression.
-
Visual Effect: Creates a sunken, elegant channel within heavy paper stocks like 300 GSM cotton cardstock.
-
Best Uses: Classic border frames, vintage signature lines, and subtle background watermarks.
Unmatched Physical Craftsmanship
Combining blind embossing or debossing with shimmering hot-foil stamping creates the ultimate luxury document finish. Explore our custom options at diplomafiles.com to give your achievements a physical impression that commands respect.
👉 Add 3D Tactile Depth. Customize Your Credentials at DiplomaFiles.com Today!